Blog for Tenants and Landlords

Whether you're Tenant or a Landlord, clarity matters.

This page is designed as a practical resource for both tenants and landlords navigating the Toronto rental market. You’ll find straightforward guidance how to rent as a tenant, how to lease as a landlord, and what to expect at every stage of a tenancy.

For tenants, the goal is simple: work with a realtor, understand your rights, and protect yourself.

For landlords, it’s about structure, compliance, and protecting your investment while building stable, respectful relationships with your tenants.


RSS

Ontario Rental Rules for 2027: What Landlords and Tenants Need to Know

Ontario’s rental rules have undergone several important changes heading into 2027.

Whether you’re a landlord renting out an investment property, a homeowner considering leasing your home, or a tenant preparing for a move, it’s important to understand how Ontario’s Residential Tenancies Act and Landlord and Tenant Board rules affect rent increases, late payments, landlord-use evictions and renovations.

Here are some of the key rules to know for 2027.

Start Rental Application

1. Ontario’s 2027 Rent Increase Guideline Is 1.9%

Ontario has set the 2027 rent increase guideline at 1.9%.

For most rent-controlled properties, this means a landlord can increase the existing tenant’s rent by a maximum of 1.9% in 2027 without receiving approval from the Landlord and Tenant Board for an above-guideline increase.

For example:

If the current rent is $2,500 per month, a 1.9% increase would be:

$2,500 × 1.019 = $2,547.50 per month

There are also timing requirements.

Generally, at least 12 months must have passed since the tenant first moved in or since the tenant’s last lawful rent increase. The landlord must also provide at least 90 days’ written notice using the appropriate form before the increase takes effect.

2. Not Every Ontario Rental Is Rent Controlled

One of the most important things for renters to determine before signing a lease is whether the property is subject to Ontario’s rent increase guideline.

Generally, rental units that were first occupied for residential purposes after November 15, 2018 are exempt from the provincial rent increase guideline.

That can include newer condominium buildings, newly constructed rental buildings, additions to existing buildings and certain newer basement apartments.

For these exempt properties, the 1.9% guideline does not limit the amount of a lawful rent increase.

However, other rules still apply, including the requirement that generally 12 months pass between increases and that proper notice be provided.

This distinction can be particularly important for renters comparing newer Toronto condos with older rental properties.

3. The N4 Non-Payment Notice Period Is Now 7 Days

Ontario has shortened the notice period associated with an N4 Notice to End a Tenancy Early for Non-payment of Rent.

For applicable notices given on or after September 21, 2026, the termination date can be as early as seven days after the notice is given, rather than the previous 14-day period.

An N4 does not mean that the tenant is immediately evicted. An eviction still requires the applicable Landlord and Tenant Board process and enforcement of an eviction order.

But heading into 2027, landlords and tenants should recognize that the initial non-payment process can now move more quickly.

Start Rental Application

4. Ontario Has Defined Persistent Late Payment More Clearly

Another important change concerns tenants who repeatedly pay their rent late.

As of September 21, 2026, Ontario regulations specify that persistent late payment includes circumstances where rent is received more than seven days after the due date at least three times within a six-month period, subject to the specific rules and exceptions in the legislation.

Persistent late payment can be grounds for a landlord to seek termination of a tenancy through the LTB.

This makes keeping accurate payment records particularly important for both landlords and tenants.

5. N12 Rules Have Changed for Landlord’s Own Use

An N12 can be used in certain circumstances when a landlord, qualifying family member or purchaser requires the property for residential occupation.

One significant change affects compensation when the landlord is taking back the property for their own use.

For qualifying N12 notices served on or after September 21, 2026, if the landlord provides at least 120 days’ notice and the termination date meets the statutory requirements, the landlord is no longer required to pay the usual compensation or offer another acceptable rental unit.

If less than 120 days’ notice is provided, the existing compensation requirements continue to apply.

Importantly, this particular compensation change does not apply to an N12 issued for a purchaser’s own use.

For landlords planning to sell a tenanted property, that distinction matters.

6. There Are New Occupancy Rules After an N12

The rules do not simply end when the tenant moves out.

For applicable landlord-use N12 notices, the landlord or other specified person is normally expected to take occupancy within 60 days of the termination date stated on the N12.

If that does not happen, the legislation can create a presumption of bad faith if the former tenant brings a T5 application. The landlord can present evidence to rebut that presumption at the hearing.

Different provisions can apply where the N12 was issued for a purchaser’s use.

For landlords, this makes documentation and genuine planning around personal occupancy especially important.

7. Renovictions and N13 Notices Have Additional Requirements

Ontario has also strengthened and clarified procedures surrounding N13 notices for renovations and repairs.

Where a tenant has properly indicated that they want to return to the property after qualifying renovations, landlords have additional notification obligations.

These can include notifying the tenant about the estimated completion date, updating them if that date changes, informing them when the property is ready and providing the required opportunity to reoccupy the unit.

For applicable renovations completed on or after September 21, 2026, the landlord must also provide the tenant with 60 days’ notice to reoccupy the unit.

A qualifying returning tenant is generally entitled to return at a rent no greater than what the landlord could have lawfully charged had the tenancy not been interrupted.

What This Means for Toronto Landlords

For landlords, the biggest lesson going into 2027 is that proper documentation and timing matter.

A rental property should be treated like a business relationship. Keep records of rent payments, use the current LTB forms, document notices and communication, and understand the rules before attempting to terminate a tenancy.

This becomes particularly important when preparing a tenanted property for sale. The rules governing a vacant property and a tenanted property are very different, and an incorrect notice or timeline can affect a transaction.

What This Means for Toronto Tenants

Tenants should understand the rules governing their specific property rather than assuming every Ontario rental operates the same way.

Before signing a lease, it is worth determining:

  • Whether the property is subject to rent control

  • When the unit was first occupied for residential purposes

  • What utilities are included

  • Who is responsible for maintenance and other costs

  • The required notice for ending the tenancy

  • Whether any additional terms in the lease are enforceable under Ontario law

For renters comparing properties, these details can be just as important as the monthly asking rent.

Looking for a Rental in Toronto?

Toronto’s rental market can move quickly, but choosing a property should involve more than simply finding an available unit.

I help clients evaluate the property, neighbourhood, lease terms and practical considerations that can affect what it is actually like to live there.

The goal is straightforward: understand what you’re signing, know what you're paying for, and choose a property that makes sense for your needs.

Thinking about renting, leasing your property, or preparing a tenanted property for sale? Let’s have a conversation.

This article is for general informational purposes only and is not legal advice. Ontario rental legislation and Landlord and Tenant Board procedures can change. Landlords and tenants should review the current Residential Tenancies Act, LTB forms and official provincial guidance or obtain legal advice for their specific circumstances.

Information current as of September 23, 2026.

Final Thoughts

Renting in Toronto can feel competitive, but with the right preparation and a realtor guiding you through every step the process becomes smooth, transparent, and stress-free.

If you’re planning to rent in Toronto and want support from start to finish, feel free to reach out. I’m here to guide you through the search, secure the best unit, and help you navigate everything with confidence.

Start Rental Application

Read

How to Rent an Apartment in Toronto as a Student: 2026 Guide

U of T, TMU, York, Humber, George Brown, OCAD & International Students

Moving to Toronto for school is exciting, but finding your first apartment can feel overwhelming, especially if you've never rented before.

Toronto's rental market moves quickly, and students face a slightly different challenge than working professionals: you may have little or no employment income, Canadian credit history, or previous rental history.

That doesn't mean you can't rent a great apartment.

It simply means you need to understand how Toronto landlords evaluate applications and prepare your documents and finances before you start looking.

Whether you're attending the University of Toronto, Toronto Metropolitan University (TMU), York University, Humber College, George Brown College, OCAD University or another Toronto-area school, here's what you should know.

Start Rental Application

1. Start With Your Campus, But Think About Transit, Not Just Distance

One of the first questions students ask me is:

"How close can I live to my school?"

A better question is:

"How easily can I get to my school?"

Toronto is a large city, and living a few kilometres farther from campus but directly on a subway, streetcar or other reliable transit route can sometimes give you a much better apartment for your budget.

For example:

University of Toronto, St. George Campus

The campus is downtown around Bloor Street, St. George and Queen's Park. Students don't necessarily need to live immediately beside campus. Neighbourhoods along Line 1 and Line 2 can provide convenient access.

Toronto Metropolitan University (TMU)

TMU's downtown campus around Yonge and Dundas is extremely transit accessible. Living anywhere with convenient subway access can make commuting relatively straightforward.

York University

York University has its own subway stations on Line 1, making areas farther south along the subway worth considering rather than limiting your search to the immediate campus area.

George Brown College

Location matters because George Brown has multiple campuses. Your rental search should be based on the campus you'll actually attend.

Humber Polytechnic

Humber also has different campuses, so your transportation needs can be very different depending on your program.

Before searching for apartments, confirm:

  • Your campus

  • Your maximum acceptable commute

  • Whether you need parking

  • Whether you'll rely on public transit

  • How frequently you expect to be on campus

2. Determine Your Real Monthly Budget

Don't look at rent alone.

Your actual housing budget may include:

Monthly rent

  • Electricity/hydro if not included

  • Internet

  • Tenant insurance

  • Transportation

  • Parking if required

Some condominiums include water and heating but charge tenants separately for electricity. Others may include additional utilities.

Always ask what's included before comparing two apartments based solely on rent.

For students trying to reduce costs, sharing a two-bedroom or three-bedroom apartment with roommates can sometimes make more sense than renting a studio or one-bedroom alone.

3. When Should Students Start Looking for an Apartment?

Toronto isn't a market where you generally need to secure a private apartment six months before moving.

Many available rentals come onto the market relatively close to their occupancy date.

That means your first step isn't necessarily viewing apartments.

Your first step is getting your application ready.

Before we start scheduling showings, I generally want to understand:

  • Where you're studying

  • When you need to move

  • Your budget

  • Preferred neighbourhoods

  • Whether you'll have roommates

  • Whether you have employment income

  • Whether a parent will be supporting you

  • Whether you'll require a guarantor

  • Your immigration/study status, where applicable

Once we understand those pieces, we can build a realistic search.

Start Rental Application

4. Documents You Should Prepare

Landlords want to understand two basic things:

Who will be living in the property? and How will the rent be paid?

A student rental application may therefore look different from an application from someone who has been working full-time for several years.

Depending on your circumstances, you should be prepared to provide some combination of:

Student Documents

  • Government-issued identification

  • University or college acceptance letter

  • Proof of current enrolment and tuition payment

  • Student ID, if already issued

  • Study permit, if applicable

  • Visa/immigration documentation where relevant to your application

Financial Documents

Depending on your situation:

  • Canadian Bank statements or proof of available funds

  • Proof of financial support from parents

  • Employment documents if you work while studying

  • Credit report, if available

  • Previous landlord references, if applicable

If a parent or another person will guarantee the tenancy, they should also be prepared to provide supporting financial and identification documents requested as part of the application.

The exact documents can vary from landlord to landlord.

5. What If I Don't Have a Job?

This is one of the biggest differences between renting as a student and renting as an employed professional.

A typical employed applicant may provide:

Employment letter + pay stubs + credit report

But many full-time students simply don't have employment income. That's normal.

The question then becomes:

How can you demonstrate to the landlord that the rent will reliably be paid?

There are generally two approaches we can explore.

Option 1: A Guarantor

A parent or another financially qualified person working in Canada may agree to guarantee your obligations under the tenancy.

The landlord will generally want to review the guarantor's financial strength, which includes income, employment, credit and other supporting documentation.

Depending on how the agreement is structured, the guarantor may also be included in the lease or sign a separate guarantee.

This can be particularly helpful for students whose parents will be financially supporting them throughout university.

Option 2: Voluntarily Offering Prepaid Rent

Another strategy sometimes used by students particularly students without employment income or established Canadian credit is voluntarily offering to prepay additional months of rent. This distinction is important.

Under Ontario's Residential Tenancies Act, a landlord can generally require a rent deposit of up to one month's rent, which is normally applied to the final month of the tenancy. A landlord should not make an additional prepaid-rent amount a mandatory deposit.

However, a prospective tenant may choose to voluntarily offer additional prepaid rent as part of an application.

In practice, I've seen students without employment income strengthen an application by voluntarily offering a substantial portion of the initial fixed-term rent in advance. In some situations, a student may choose to offer up to the full initial 12-month term.

This can give a landlord additional confidence where the student cannot provide the traditional employment and income documentation expected from a working tenant.

Start Rental Application

6. What Happens After the First Year?

A common misconception is that signing a one-year lease means you automatically have to leave after one year.

For most Ontario residential tenancies covered by the Residential Tenancies Act, that's not how it works.

At the end of a fixed-term lease, the tenancy will generally continue on a month-to-month basis unless the tenancy is properly terminated in accordance with Ontario's rules.

You don't normally need to sign another one-year lease simply because the original term has ended.

This is particularly useful for students who aren't sure exactly how many years they'll remain in Toronto.

7. Should Your Parent Rent the Apartment for You?

Parents are often very involved in a student's first rental and that's understandable, particularly when they're paying some or all of the rent.

But remember: The student is the person who will actually be living in the property.

When I work with a student, I prefer to communicate directly with the student throughout the search while keeping parents involved where appropriate.

The landlord will want to understand who is actually occupying their property.

Your parent can still play an important role by:

  • Helping financially

  • Reviewing properties with you

  • Providing supporting financial documents

  • Acting as a guarantor where agreed

  • Helping you evaluate the lease

Think of it as a team: the student is the prospective tenant, while the parent can provide financial strength and support.

8. International Students Renting in Toronto

International students often worry that they won't be able to rent because they don't have Canadian credit.

It's a common situation.

If you've just arrived in Canada, it's entirely reasonable that you may not yet have:

  • Canadian employment history

  • Canadian credit history

  • Previous Canadian landlords

Instead, your application needs to tell the landlord the complete story.

That may include your:

  • Passport/identification

  • Study permit

  • University acceptance or enrolment

  • Proof of tuition/enrolment

  • Proof of available funds

  • Parent or family financial support

  • Guarantor, where applicable

  • Voluntary prepaid-rent proposal, if appropriate

The objective is to present a complete, organized and financially credible application.

9. What About Pets?

Ontario's rental rules are sometimes surprising to students. A typical "no pets" clause in a residential lease is generally not enforceable under the Residential Tenancies Act.

However, condominiums are different.

If you're renting a condominium, the condominium corporation may have rules restricting certain pets, and tenants are required to comply with applicable condo rules.

So if you're bringing a cat or dog to Toronto, tell your Realtor before you begin your search rather than waiting until the application stage.

10. Viewing Apartments

Once your budget, move-in date, documents and application strategy are ready, we can start looking at properties.

When viewing a rental, don't just ask: "Do I like it?"

Pay attention to:

  • Natural light

  • Bedroom size

  • Closet/storage space

  • Laundry

  • Building security

  • Noise

  • Heating and air conditioning

  • Included utilities

  • Internet options

  • Building amenities

  • Grocery stores

  • Transit

  • Commute to campus

  • Condo rules

  • Furniture placement

A beautiful apartment isn't necessarily a good student apartment if getting to an 8:00 a.m. class takes an hour.

11. Submitting Your Rental Application

When we find the right property, we put together the application.

Depending on the property and landlord, this may include:

  1. Rental application

  2. Identification

  3. Student/enrolment documentation

  4. Credit information where available

  5. Proof of funds

  6. Guarantor documents if applicable

  7. References where available

  8. Offer to lease

  9. Any voluntary prepaid-rent proposal being offered

The goal isn't simply to send documents.

It's to present the landlord with a clear picture of who you are and why you will be a responsible tenant.

A well-organized application can make a significant difference.

12. After Your Application Is Accepted

Once the landlord accepts the agreement, make sure you understand:

  • When your deposit is due

  • When your first month's rent is due

  • How future rent will be paid

  • Which utilities you need to set up

  • Tenant insurance requirements

  • Key/fob arrangements

  • Elevator reservations for moving

  • Condo registration requirements, if applicable

Most private residential tenancies in Ontario are required to use Ontario's Standard Form of Lease.

Read your agreement carefully before signing.

13. Common Mistakes Students Make

Starting with properties instead of preparation

Finding the perfect apartment doesn't help if you aren't ready to submit an application.

Letting your parents handle everything

Your parents can absolutely help, but you're the person moving into the property. Be involved in the conversations, showings and application.

Looking only beside campus

A 10-minute walk isn't always worth hundreds of dollars more per month. Sometimes a direct 15- or 20-minute subway ride gives you significantly better options.

Not understanding the full monthly cost

Always account for utilities, internet, insurance, transportation and parking.

Sending money too quickly

Verify who you're dealing with and understand what you're signing before transferring significant funds.

Hiding important information

Pets, roommates and intended occupants should be discussed upfront. Surprises rarely strengthen a rental application.

My Student Rental Checklist

Before we begin looking for your Toronto apartment, have the following ready:

  • Confirm your school and campus

  • Determine your monthly rental budget

  • Choose your preferred move-in date

  • Decide whether you'll live alone or with roommates

  • Prepare government-issued ID

  • Prepare your acceptance/enrolment documents

  • Prepare your study permit if applicable

  • Prepare proof of funds/financial support

  • Determine whether a parent or other person will act as guarantor

  • Decide whether you would consider voluntarily offering prepaid rent

  • Determine your maximum acceptable commute

  • Tell me about pets, parking or other important requirements

Once those pieces are ready, then we can focus on finding the right home.

Moving to Toronto for School?

Whether you're starting at U of T, TMU, York, Humber, George Brown, OCAD or another Toronto school, finding an apartment doesn't have to mean sending dozens of applications and hoping someone says yes.

My job is to help you understand the market, identify realistic options, prepare your application and negotiate the terms of your rental.

And if your parents are helping you financially, they're welcome to be part of the process too.

But I want to get to know you the person who will actually be calling Toronto home.

Let's start with your budget, campus and move-in date, and build your rental search from there.

Start Rental Application

This guide provides general information about renting in Ontario and is not legal advice. Rental circumstances and landlord requirements vary, and Ontario's Residential Tenancies Act and other applicable laws should be considered for your individual situation.

Read

A Complete Guide to How Renting Works in Toronto (2026 Edition)

Finding a rental in Toronto can feel overwhelming especially if you’re new to the city, new to Canada, or renting for the first time. Between competitive listings, documentation requirements, and fast-moving timelines, it helps to understand exactly how the process works before you start booking showings.

Here’s a clear, step-by-step guide to how renting works in Toronto, what documents you’ll need, and how a licensed realtor helps you secure the right home with confidence.

Start Rental Application

TL;DR

Here’s a simple breakdown of how renting works in Toronto:

  1. Define your budget, move-in date, and preferred neighbourhoods/buildings.

  2. Prepare your documents (photo ID, employment letter, recent pay stubs, full credit report, and references).

  3. Choose how you want to be screened - Pick between Self-serve Digital Screening (invite only by realtor) or Manual Screening.

  4. Put pen to paper and formally engage me as your realtor. In Toronto, landlords pay the commission, so you receive full representation at no cost to you.

  5. Plan and schedule showings based on listings that match your criteria.

  6. Submit a strong rental application with supporting documents. Negotiate terms as needed. Once accepted, provide the first and last month’s rent deposit or any other voluntary amounts.

  7. Sign the Ontario Standard Lease and arrange key exchange on occupancy date.

⚠️ To book property showings in Toronto, you’ll need to work with a licensed realtor. Your agent is your representative throughout the entire search and application process at no cost to you. In Ontario, landlords pay the commission.

Here’s how I help renters:

  • Identifying suitable listings and planning property tours

  • Advising on neighbourhoods, commute times, and rental market values

  • Preparing and submitting rental offers

  • Negotiating terms on your behalf

  • Managing paperwork and guiding you through the approval process

  • Facilitate key exchange on occupancy date

Start Rental Application

Step 1 - Move-In Date and Budget

Define your budget, move-in date, and preferred neighbourhoods/buildings.

Step 2 - Prepare your documents

There are 2 options for tenants to choose from when it comes to tenant screening. Regardless of which method you choose, here are the documents you need to rent a property in Toronto:

2 Pieces of Photo ID

Accepted forms include:

  • Permanent Resident Card

  • Canadian Driver’s Licence

  • Passport

Full Credit Report

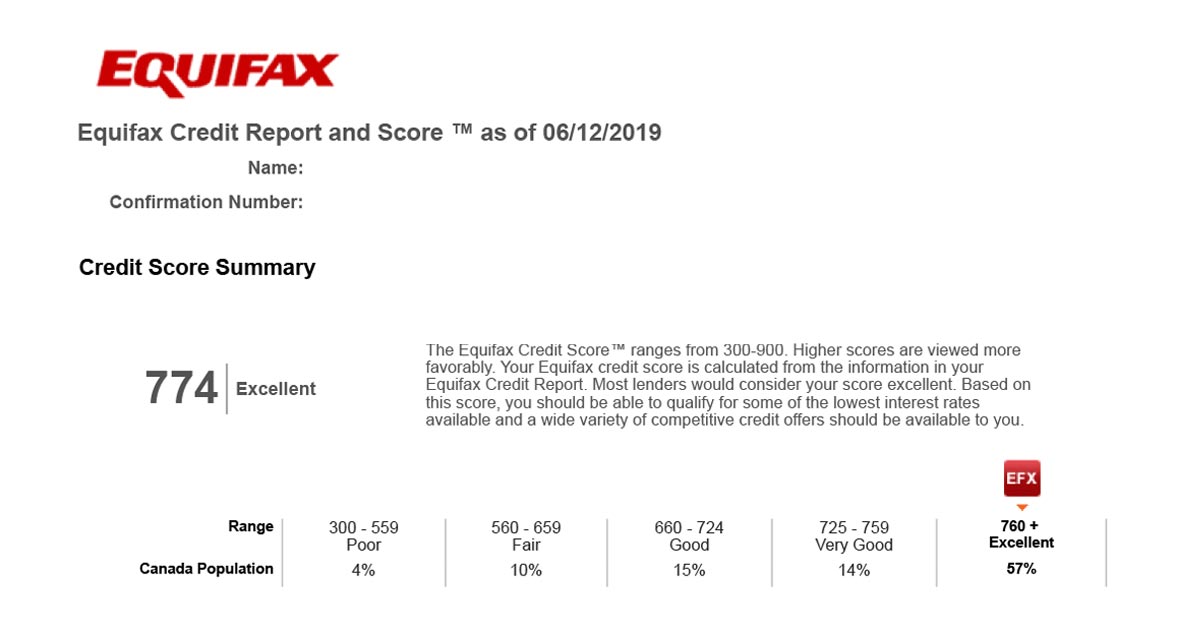
Equifax or TransUnion are generally the accepted credit reports.

Must include your current credit score (not just the summary page).

Income & Employment Verification

If you’re employed:

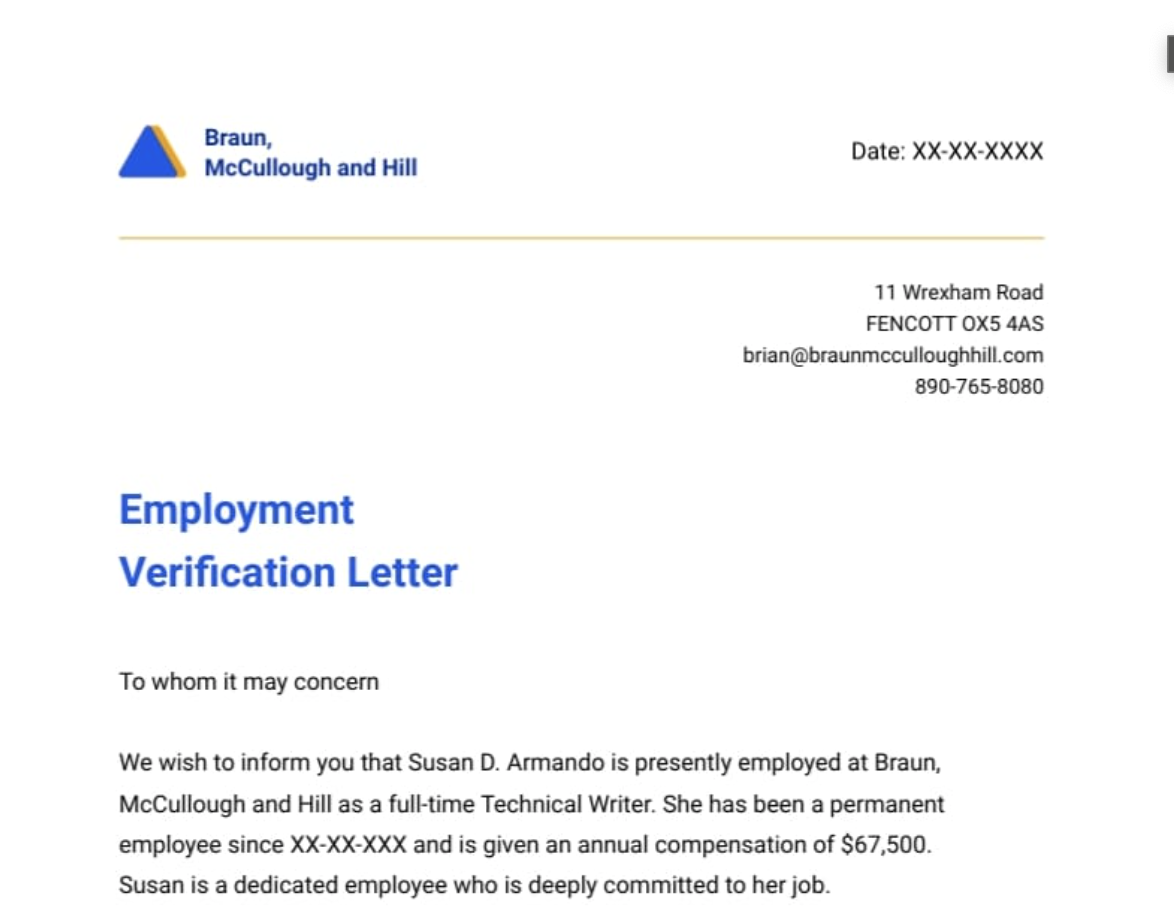
  • Employment letter

  • Recent T4 (if available)

  • Last 2 months of pay stubs

  • 2–3 months of Canadian bank statements showing recurring pay deposits

  • If new to employment, landlords prefer to see $30–80K in savings

  • If employed internationally (US/UK/etc.), an employment letter is sufficient

If you’re self-employed:

  • 1–2 years of business bank statements

  • Tax returns and/or Notice of Assessment showing stable income

Guarantor Information (If Needed)

A guarantor may be added as a lessee to strengthen your application.
Required:

  • Two pieces of ID

  • Proof of income (employment letter, pay stubs, T4, or NOA)

Rental History (If Applicable)

  • Previous landlord reference and contact info

  • Proof of past rent payments

Tip: A strong, complete package can make the difference between getting approved or losing a unit to another applicant.

Step 3 - Tenant Screening - Your Choice!

Property showings are scheduled AFTER a prospective tenant completes a basic screening process.

This allows landlords to understand who will be entering the property and helps protect the safety and liability of both the current tenant and the landlord.

For tenants, having your documents prepared in advance gives you a strong advantage. In Toronto’s competitive rental market, especially in sought-after neighbourhoods and buildings, landlords expect a complete rental application package. Being organized allows your realtor to act quickly and submit a strong offer as soon as you find the right property.

You have 2 options to complete tenant screening:

SINGLEKEY

Option 1 - Self-serve Digital Screening - SingleKey

SingleKey is an all-in-one tenant screening solution that puts renters in control of their personal information while searching for a new home. It streamlines the rental process, creating a secure and seamless experience for tenants, realtors, and landlords alike.

Cost: $29.99/report

Option 2 - Realtor Manual Screening

This requires tenants to send all personal documents to the realtor through email or upload documents to secure cloud storage.

Cost: $0

Step 4 - Formalizing the Tenant–Realtor Relationship

Before we begin showings, two mandatory documents must be reviewed and signed:

1. RECO Consumer Information Guide

This outlines your rights and responsibilities when working with a realtor in Ontario.

2. Buyer Representation Agreement (BRA)

Although the name sounds like it’s for buyers, it’s also used for renters.
This document:

  • Formalizes our working relationship

  • Defines the search area (e.g., City of Toronto)

  • Sets a clear time frame for the agreement

I’ll send both documents digitally so you can review and sign them at your convenience.

Step 5 - Property Search & Plan Showings

Once the paperwork is completed, I’ll create a personalized property search based on your budget, preferred neighbourhoods, transit needs, unit size, and amenities.

We’ll schedule showings usually over one or two days during the same week you’re ready to submit an offer. Toronto rentals move quickly, so timing is key.

Step 6 - Submitting a Rental Offer

When you find the right place, I’ll prepare and submit the offer for you.
If your offer is accepted, you’ll need to provide:

✔️ First and Last Month’s Rent Deposit

This must be submitted within 24 hours of acceptance.
Accepted formats:

  • Certified cheque

  • Bank draft

  • Wire transfer

Tip: Keep your deposit funds ready in a chequing account so you can act fast.

Step 7 - Lease Signing & Key Exchange

After the landlord receives your deposit, you’ll be issued a firm lease under Ontario’s Residential Tenancy Agreement (RTA).

We’ll then coordinate:

  • Lease signing

  • Move-in inspection (if applicable)

  • Key exchange (usually on the lease start date)

From here, you’re officially ready to move into your new home.

Final Thoughts

Renting in Toronto can feel competitive, but with the right preparation and a realtor guiding you through every step the process becomes smooth, transparent, and stress-free.

If you’re planning to rent in Toronto and want support from start to finish, feel free to reach out. I’m here to guide you through the search, secure the best unit, and help you navigate everything with confidence.

Start Rental Application

Read

What It Means to List Your Property for Rent with Elie

Thank you for considering me to help rent out your property. I want to take a moment to explain what it means to list your property for rent when we work together, so you know exactly what to expect. 

Talk to Elie

Let’s break it down into 8 steps

1. Pricing Strategy & Market Analysis

Getting the price right is the first step to renting your property successfully. I start by conducting a detailed comparative market analysis (CMA) that looks at similar properties currently listed and recently leased in your building or neighborhood. I assess factors like square footage, layout, finishes, parking, and views to position your unit competitively.

Beyond the data, I also factor in seasonal demand trends, vacancy rates, and recent tenant behavior to determine what price point will attract strong interest without sitting on the market. The goal is to strike the perfect balance: maximizing your rental income while minimizing vacancy time and tenant turnover.

Once we lock in a price, I guide you on how to highlight your property’s strengths so it stands out against the competition—whether it’s natural light, storage, outdoor space, or proximity to transit.

2. Marketing Your Property

Once we sign a listing agreement, I’ll begin marketing your rental professionally. This includes:

  • High-quality photos (and video tours if needed)

  • A compelling, accurate property description

  • Posting on RE/MAX, MLS, and Realtor.ca

  • Promoting to my agent network and social media including Instagram, Facebook, TikTok, YouTube, and LinkedIn

3. Managing Showings

  • Scheduling & confirmation: I handle all appointment requests and use showing‑management software so you always know who’s coming and when.

  • Guided tours: I or a licensed REALTOR® in Toronto attend every showing to spotlight key features and answer questions on the spot.

  • Security: Lights on/off, doors locked, and detailed sign‑in tracking for full accountability.

  • Feedback loop: Post‑showing summaries so you see how the market is responding in real time.

4. Tenant Screening

All prospective tenants will be carefully screened to ensure they meet your requirements. There are 2 approaches that we can pursue to screen tenant appliactions.

Approach 1 - PropTx Verify

Your card title

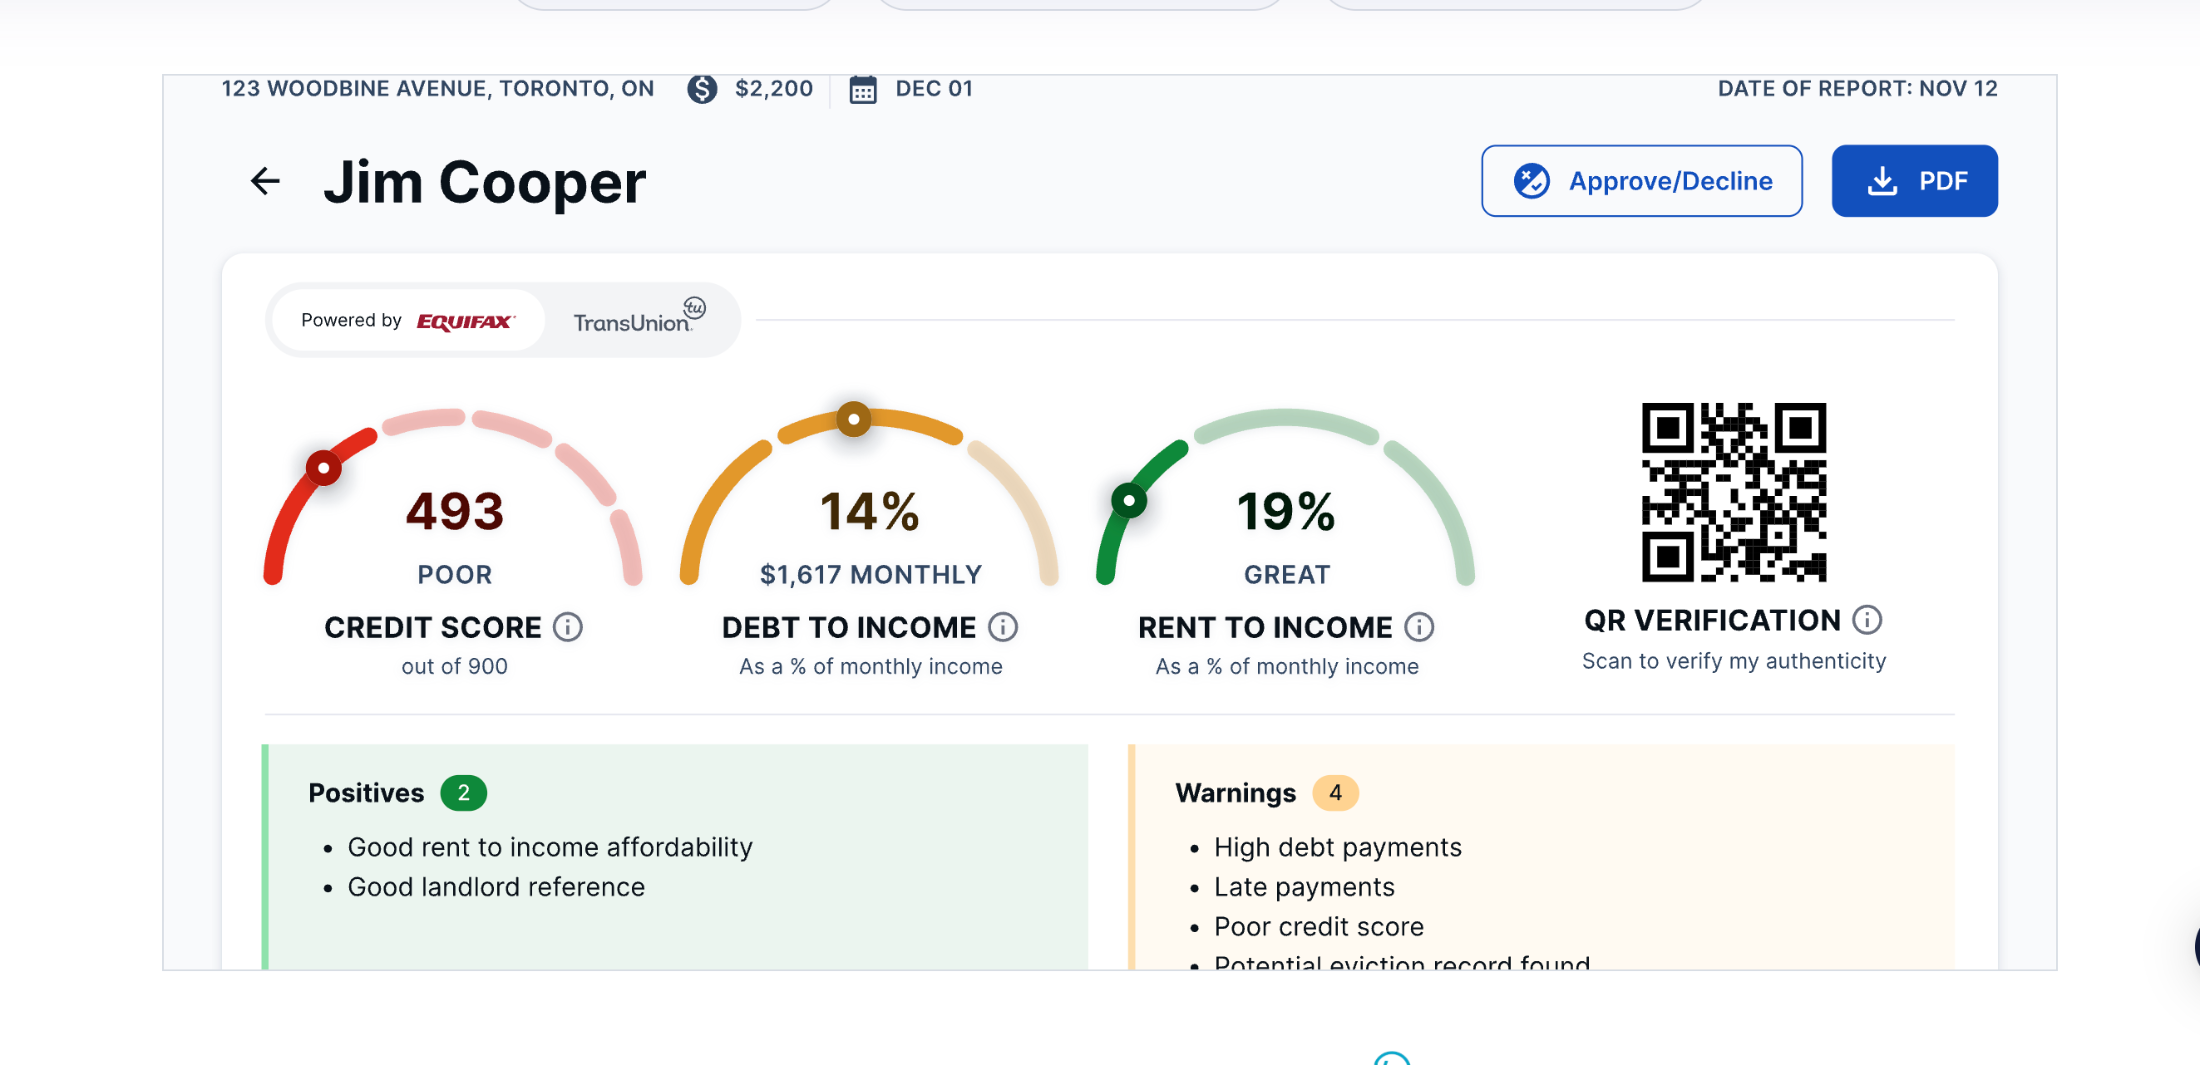
PropTx Verify™ powered by Cove is a TRREB partner offering a secure, all-in-one tenant screening solution that delivers peace of mind for landlords, greater control for tenants, and a powerful new tool for REALTORS® to further enhance their role as trusted advisors.

Approach 2 - Manual Screening

This involves asking tenants to provide:

  • Credit check via Equifax, TransUnion, or SingleKey

  • Employment and income verification, including:

    • Letter of employment

    • 1–2 months of recent pay stubs

  • References from previous landlords and their contact information

  • On a case-by-case basis, I may also request:

    • 3–6 months of recent bank statements (chequing/savings)

    • Official study permit

    • University or school registration confirmation

    • Proof of tuition payment

    • Valid work permit

    • Marriage certificate (to confirm shared responsibility of a dependent)

All documents are reviewed for authenticity and completeness before being presented to you.

5. Shortlisting Tenants for Your Review

I’ll only present you with qualified, pre-vetted candidates, so you save time and can feel confident in your decision. You’ll receive:

  • A summary of each candidate

  • All supporting documents in one place for easy comparison

  • My professional recommendation (but final decision is always yours)

6. Negotiating and Preparing Lease Documents

Once we identify an ideal tenant, I’ll take care of:

  • Negotiating lease price and terms to protect your interests

  • Drafting the Agreement to Lease (Form 400)

  • Ensuring deposits are submitted as a bank draft or certified cheque

  • Preparing the Ontario Standard Lease with supporting schedules

  • Collecting e-signatures from both parties

7. Move-In Coordination

After lease signing, I’ll guide the tenant through a smooth move-in process:

  • Utility transfer (hydro, gas, etc.)

  • Tenant’s property and liability insurance

  • Finalizing rent payment setup (e-transfer, cheques, or other)

  • Setting expectations for keys, access, and next steps

8. Key Handover

I’ll coordinate the key exchange either:

  • In person or

  • Via a lockbox (based on your preference and availability)

If you have any questions or would like to get started, I’m just a call or text away. Looking forward to helping you find the right tenant!

Talk to Elie

Read
This website may only be used by consumers that have a bona fide interest in the purchase, sale, or lease of real estate of the type being offered via the website. The data relating to real estate on this website comes in part from the MLS® Reciprocity program of the PropTx MLS®. The data is deemed reliable but is not guaranteed to be accurate.